Saturday, September 5, 2009

THINKING OUTSIDE OF THE BOX


Dave wanted to enclose the ducts, I guess for different reasons. In the dining room we have ducts in two corners. We are going to be building cupboards around these ducts anyway, but by enclosing them within those cupboards, it will prevent anything I put in the cupboards from falling down in back of the ducts.

Dave was able to use plywood he had already on hand, so that was a plus. He built two half boxes from the plywood to fit around the ducts. They were easy enough to build but attaching them proved to have some issues as there weren't studs everywhere to attach them.

Dave purchased some inexpensive plates which he could bend. See the picture. The perforations made them easy to bend in right angles. He bent the plates over a 2x4 and then used a right angle/square to even them up a bit. He next attached the bent plates to the half boxes he built and then nailed them to studs. It worked great. My picture of the two boxes, installed, didn't come out. I will have to take another.

MYSTIC MASTIC


Here's a charming little picture of Dave applying Mastic to the duct seals. Mastic is easy to use. Apply it by hand with a vinyl glove.

COAX and CAT6


We are to the point where we need to get some extra wiring in. We are installing COAX for TV and CAT6 for phone and computer networking. We have wireless but we don't know the future so we're trying to cover our bases in case we need a backup. This picture shows the COAX for the TV hanging down in the den. That wire is going upstairs for the little TV we plan to have in the dressing area. The gray stick-looking things on the floor are extra pieces of the pipe insulation (see earlier post).

A LITTLE HERE, A LITTLE THERE


We are now at the nitty gritty so we are doing a little bit of work here and a little bit of work there.

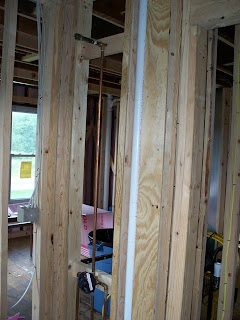
Case in point, I insulated the water pipes. We used 1/2" and 3/4" gray pipe insulation. We used these sizes because those are the sizes of our water pipes. The insulation is a gray foam, extremely light weight and easy to use. The pipe insulation is split and has a peel-off area that, when removed, reveals the sticky edges where the insulation closes around the pipe. In this picture, the gray verticle stripes are where I insulated the pipes.

Did I say this was easy to use? It also cuts like a dream with a utility knife. :)

Just in front of the pipes are two verticle pieces of wood that were installed for blocking. This area is in the den and is for support when we hang a television on the wall. We also installed blocking for toilet paper rolls and towel pars and where we think we might use handrails in the future.

APPROVED, APPROVED, APPROVED

Before I forget to say it, all our inspections have been approved with flying colors. So far we have had inspections for framing, rough plumbing, rough electric, and a heating and insulation inspection.

Speaking of inspections, our building permit from the town actually expired at the end of August. Yes folks, it had been hanging in the front window for one year. I renewed the permit this week ($25.00) and the only thing left on it is FINAL INSPECTION. Yipee!!!!!! The new permit hangs proudly in our front window.

Friday, September 4, 2009

NICHES


Last weekend Dave and I built a couple of niches or book shelves to take advantage of some wasted space in the hall/closet area on the second floor. They came out good.

Here is a picture of one of the niches. There is an identical one across the hall from this one. Dave, of course, built a jig to drill the holes along each side of each niche for adjustable shelving. I did all the sanding and helped with construction and gluing up. We also added a strip along the front of the shelf to make it a little more finished. Eventually we will have molding around the box. If you add something like this niche, make sure you allow for the drywall to be added around it. That's why the box looks like it is sticking out. It is sticking out so that it can accomodate drywall. Our boxes will be painted. (The shelf is just propped in the box in this picture.)

BRINGING IN THE BIG GUNS


Whoosh!

It seems it happened that fast. Mike Jag (Jag Construction, Rochester, NY) had his crew in lickety split to spray in the foam insulation. All exterior walls and the roof space were done. It took a little less than two days. We were very pleased with the outcome and the crew. Here are some pics of the finished product.

PINK, PINK, PINK


Before the foam insulation was applied, we needed to have something for it to adhere to in the event we removed the siding from the exterior of the house. We could have used a cardboard but we instead chose pink, fan-fold insulation with an R-value of about 1. Again, with the house the way it was built, no two bays were the same as each other or even the same in one straight vertical shot. Therefore we needed to measure and cut every piece. The only easy thing was that we had a pretty good system of Dave measuring and cutting (utility knife works well) and I applied the sheets. This was again easy because the nails were exposed from the exterior siding (facing inward) and I could just pop the insulation on the walls (between the stud interiors) and the nail points secured the fan-fold. Here are a bunch of pics.

BTW - fan-fold is relatively inexpensive and also works well to protect your floors, especially if you are just working in a small area. It worked like a dream.

BTW2 - to cut the fan fold, we set up an old card table with an old piece of door slung across it. It made a great cutting board and was easily moved around the house.

BTW3 - we only did this insulation to exterior walls and did not do the ceiling.

LIGHTING PICS


Here are some lighting pics.

One of the things I did before we insulated was to take a picture of every single place there was a wire, duct, or any kind of plumbing. That way, we'll have a reference if we ever need to know where something is located behind a wall or underneath the insulation.

Okay - not many pics of the electrical. What I do have here are pics of the fans - one in each bathroom. Dave ordered them up and they will be super quiet. The other picture is of some of the eyeball lights we are putting in the house (Nora Lighting). They are adjustable spots lights of a sort to light up artwork and such things. They have a very big area they can light and their profile is small (4"). We have 6 in the house all together.

When you do your lighting, walk through every single room and figure out how you are going to use it and how it will be lighted and then you will figure out where to put switches, dimmers, and things like that.

We opted to only include dimmers in the dining room for right now as they are expensive when you start adding them to all your lights, though that is a goal.

PLUMB DIDLEY UMB


As previously posted, our rough plumbing was completed and passed inspection just fine. I've added some pics.

SHED - BEFORE AND AFTER


I found the pictures. Here's the shed before and after. Dave and I cut down all the overgrown shrubs and trees out back of the shed. I would like to make a patio area out there over the next year or two. The shed is in kind of rough shape but I wanted to get it scraped and painted, at least. It's really pleasant out back of the shed. Maybe next year it will get done. We also thought we might get the roof replaced on the shed this fall but I'm not sure we'll get to it.

AFTER A JOB WELL DONE


Even though this post is a bit out of sync, I thought I would include it. Here's a picture of Dave and Jay Harding about 5:30 on a Friday afternoon, having a beer after a long and busy day doing electrical work.

Ignore the shed in the background. That was MY summer project. I scraped and painted it. If I can find a picture, I'll put that up. Emma, our awesome Yellow Lab, is in the foreground. She loves to participate in everything.

DRYWALL

Yup. The time is near. Dave contacted Jerry Knibbs a few days ago and told him we would be ready for his crew this coming week. Due to another very large roofing job, though, Jerry's crew can't make it until the end of the following week.

Today is the beginning of a holiday weekend (3 days) and Dave took the day off today. We are building boxes around the corner duct work in the dining room and working on other various things.

Our geothermal unit was also delivered the other day. It's larger than I thought and is currently sitting on a pallet on the basement floor. It will eventually be hung from the ceiling.

MARGARET HAS LEFT THE BUILDING

We believe Margaret has left the building. I'm almost sorry. Almost. I wish her well.

However...a garter snake took her place but Dave evicted her quickly.